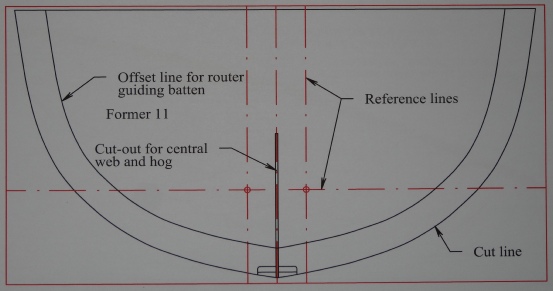
Selway Fisher Design very kindly provide CADD dxf files for the 13 formers. I am fortunate in that I have used CADD for much of my working life, and also in that I have access to an AO plotter. As this will plot plans up to 1.1 metres wide, and any length, I decided that I would plot the plans full size and glue them to the plywood. In that way I could ensure that the moulds were both accurate and symmetrical about the centre line of the boat. I printed a couple of the plans with great enthusiasm, in a hurry to start construction. I then realised that a little thought was required, as cutting curves with a small jig saw always results in small deviations from the curve. I therefore modified the plans, adding a line parallel to cut line. This second line was offset by exactly the distance between the edge of my router and a straight router cutter. I also added both vertical and horizontal reference lines on each mould so that, when I finally set up the complete mould, I will be able to use a laser level to exactly align the formers.
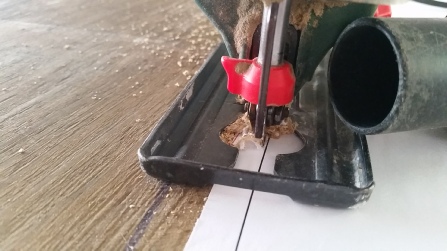
I glued the first amended plan to my 18 mm plywood (recovered scrap from an old floor), using spray glue bought at a carpet shop. I then cut very close to the cut line with a jig saw, and very
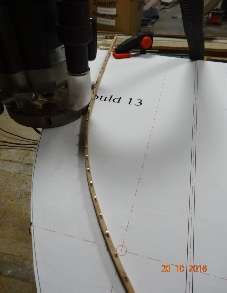
carefully pinned a 6 mm X 6 mm oak batten precisely along the offset line with panel pins. Running the edge of the router along this batten resulted in a very pleasing fair curve. In fact it was so accurate that the cut line bisected the printed cut line on the paper. Result! Only 12 formers to go.
Below is a copy of one of the former plans, and a couple of photos of the process.